SteamCMD: Error! App state is 0x2 after update job
Description of issue:
When trying to install or update the dedicated server via SteamCMD, it will result in the following to be displayed:
Error! App ‘996560’ state is 0x2 after update job.Causes:
There is no official documentation about this error, but with testing and other forums online, the cause is network related on your end. The most common causes are the following following:
- DNS server issue.
- IPv6 enabled.
Solutions:
How to change DNS server:
Linux
Note: This may be different for your distro, this was tested with Ubuntu 24.04.2 LTS.
- Open a SSH connection to your server using an account with sudo permission.
- Use the following command:
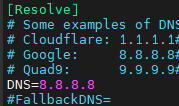
sudo nano /etc/systemd/resolved.conf - Locate the
[Resolve]section, and uncomment theDNS=line by removing the # from the start of the line. - Add your preferred DNS to the line, for example:
DNS=8.8.8.8.
- To save the changes press CTRL + S to save, then CTRL + X to leave the file editor.
- Restart the systemd resolved service to apply the changes by running the following:
sudo systemctl restart systemd-resolvedWindows
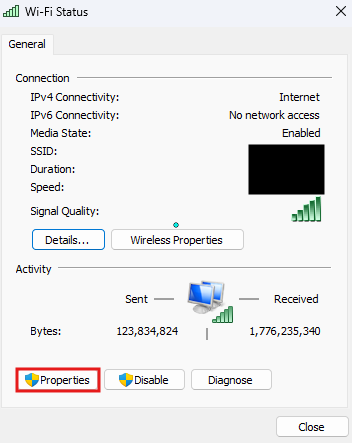
- Press Windows button + R together, and enter ncpa.cpl into the Run prompt.
- Find your local network or ethernet, double click it and select Properties.
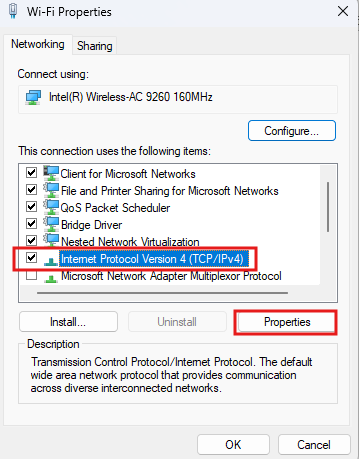
- Find Internet Protocol Version 4 (TCP/IPv4), click it and select Properties.
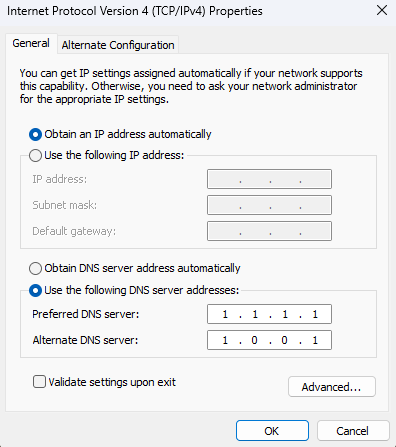
- Click "Use the following DNS server addresses:" and change it to your preferred DNS server, as shown below, we are using Cloudflare.


How to disable IPv6:
Linux
Note: This may be different for your distro, this was tested with Ubuntu 24.04.2 LTS.
- Open a SSH connection to your server using an account with sudo permission.
- Run the following command:
sudo nano /etc/sysctl.conf - Use the arrow keys to navigate to the bottom of the file.
- Copy and paste the following three lines into the end of the file:
net.ipv6.conf.all.disable_ipv6 = 1
net.ipv6.conf.default.disable_ipv6 = 1
net.ipv6.conf.lo.disable_ipv6 = 1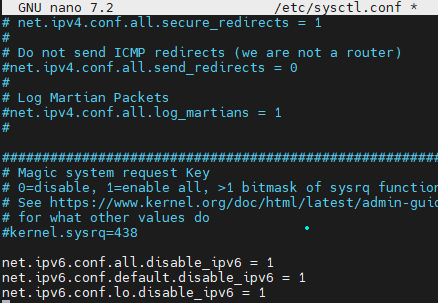
- To save the changes press CTRL + S to save, then CTRL + X to leave the file editor.
- Run the following command to reload and apply the changes:
sudo sysctl -p

Windows
- Press Windows button + R together, and enter ncpa.cpl into the Run prompt.
- Find your local network or ethernet, double click it and select Properties.
- Find Internet Protocol Version 6 (TCP/IPv6), toggle off the setting as shown in the yellow box .


Have questions or still have issues?
Please contact our Technical Support team here.
No comments to display
No comments to display